How to Use Track Ballast for a Realistic HO Scale Layout
How to Use Track Ballast for a Realistic HO Scale Layout
How to Use Track Ballast for a Realistic HO Scale Layout
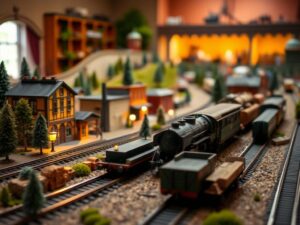
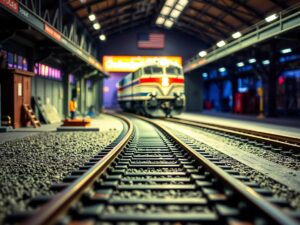
Welcome back to the world of HO scale model railroading! Today, we’re diving into one of those little details that can make a HUGE difference in the realism of your layout: track ballast. Yes, weâre talking about that stone-like material that hugs your tracks and adds depth to your scenery.
While many hobbyists focus on the trains themselves, neglecting the foundation â your track bed â leads to flat, uninteresting layouts.
Let me assure you, friends, proper HO scale track ballast is the key to unlocking a more authentic and captivating model railroading experience. So, put on your safety goggles and grab that landscaping knife â weâve got a world of realistic possibilities to explore!
Why Is Ballast So Important?
Ballast serves several crucial purposes:
-
Authenticity: Let’s be honest, without ballast, our HO scale tracks would look awfully sterile. It mimics the real-world ballast found around actual railroad tracks, creating that believable “lived-in” atmosphere we crave.
-
Support & Stability: The small rocks in your ballast arenât just there for aesthetics. They help distribute the weight of your rolling stock across a wider area, keeping those track sections sturdy and reducing potential wobbles or derailments.
-
Scenery Enhancement: Ballast becomes a canvas for texture and dimension! We can build intricate gradients around our tracks, creating realistic transitions between different landscapes, mimicking the effects of weathering, erosion, and even plant growth.
Choosing the Right HO Scale Ballast
Before we grab those shovels, let’s discuss ballast types! Thankfully, thereâs a ballast variety to match every scale and taste:
- Ready-To-Use Ballasts: These are fantastic for beginners! Pre-made kits usually come in bags of mixed sizes, perfectly sculpted to resemble real ballast. Popular brands include Woodland Scenics and Walther’s.
- Gravel Products: Don’t overlook your local landscaping suppliers! Crushed stone or pea gravel can work surprisingly well with a little sorting and sifting. Itâs an economical alternative, but ensure the grain size matches your track gauge.
Ballast Placement Tips & Techniques:
- Less is More: Resist the urge to bury your tracks completely in ballast. A moderate amount is enough for a convincing effect. Aim for about ¼ – ½ inch depth along your rails.
- The Art of Texture: To add visual interest, mix different ballast sizes. Think large chunks at the edges, gradually transitioning to finer stones closer to the rail head.
Track Bed Prep: Laying the Foundation
- Smoothly Sized Railbeds: After laying your track, ensure your ties and rail heads are level using a straightedge or a spirit level. Aim for a perfectly smooth surface beneath your ballast for better adhesion and drainage.
- Base Material is Key: Consider adding a thin layer of sand or gravel under the track bed. This not only creates drainage but also provides a solid foundation for your ballast to stick to.
Applying Your HO Scale Ballast
- Gentle Scattering: Avoid piling ballast onto your tracks! Start by lightly scattering it around the rail head using your fingers, an old spoon, or a dedicated track ballasting tool.
- Packing Down & Securing: After youâve created an even distribution, gently tamp down the ballast along the sides of the tracks to secure it in place. Use a flat edge tool or a wooden dowel wrapped in cloth for best results.
Creating Realism with Scenery Essentials
- Weathering Effects: Once your ballast is firmly settled, create natural-looking weathering by dusting on powdered pigment (rust brown, gray, or yellow are common choices). You can also use sprays to create faded and weathered effects, making it look like years of sunlight, rain, and dust have worked their magic.
- Grass & Vegetation: Add miniature static grass clumps, fine turf or tiny succulents around your tracks for that final touch of realism. Just be sure they’re carefully placed not to block any wheel flanges!
Tips From the Ballasting Expert (Just Your Friend)!!:
- Experiment with Tools: You can achieve incredible results using simple household items like sponges, brushes, and even crumpled paper. Donât be afraid to get creative!
-
Work in Stages: Applying ballast over a large area can feel daunting. Break it down into smaller sections to keep the process manageable.
-
Practice Makes Perfect: As with anything in model railroading, ballasting is a skill that improves with practice. Don’t be discouraged if your first attempt isn’t perfect.
HO Scale Track Ballast: Conclusion and Resources:
The use of HO scale track ballast takes your model railroad from good to truly remarkable. It elevates the entire visual experience, adding depth, detail, and realism. While it requires a little time and patience, trust me, the final result is worth every bit of effort!
For even more inspiration and tips, check out these resources:
- Model Railroader Magazine: Packed with articles, tutorials, and stunning layout photographs.
- Trains.com: A comprehensive online community with forums, model reviews, and educational content.
Keep on building those magnificent HO scale layouts, fellow hobbyists! Iâll see you in the next post for another deep dive into the fascinating world of miniature trains!
Happy Railroading!


