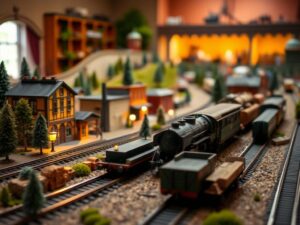
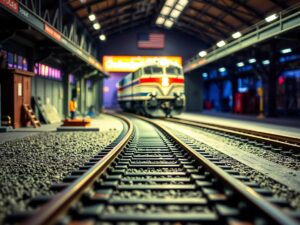
Creating Realistic Backdrops for HO Scale Layouts
Creating Realistic Backdrops for HO Scale Layouts
Creating Realistic Backdrops for HO Scale Layouts
Welcome, fellow railfans! Today, we’re diving deep into one of the most rewarding aspects of model railroading: crafting stunning HO scale backdrops that truly transport your imagination to another world. Whether you’re a seasoned enthusiast or just starting your modeling journey, mastering the art of backdrop creation can elevate your layout from good to extraordinary.
Why Backdrops Matter
Imagine this: you painstakingly construct intricate track layouts, carefully select rolling stock, and lovingly detail your model buildings. Yet, your scenery feels incomplete. Something is missing that vital depth and realism. That’s where backdrops come in. They are the foundation of a believable world, setting the stage for your trains to traverse captivating landscapes and townscapes.
The Power of Perspective
Backdrops don’t simply provide visual interest; they manipulate perspective and scale. In miniature, everything seems larger, closer together, and potentially flattened. A skillfully painted backdrop helps overcome these optical illusions, giving a sense of depth and grandeur to your layout. It defines the world beyond your trackage, letting you tell a story through visuals rather than just locomotives chugging along.
Understanding HO Scale: A Tiny Universe Demands Big Creativity
Before we get into techniques, remember that HO scale operates at 1:87. Every element needs to be proportional, and your backdrop must reflect that scale accurately.
Think of a typical American town â hills roll away in the distance, buildings have varying heights, and there’s often a clear horizon. This interplay between elements creates depth. When recreating this on an HO scale layout, it becomes crucial to depict these nuances with careful attention to size ratios and perspective.
Essential Backdrop Elements: A Palette of Possibilities
Mountains & Hills: They are the backbone of many model railway backdrops. Utilize shades of brown, gray, green for foliage, and white for snow if appropriate. Varying brushstrokes, adding texture through sponge or stippling, and blending colors can mimic real terrain effectively.
Forests: Trees come in a myriad of shapes, sizes, and greens. Don’t just paint blocks; layer various hues and shades to simulate sunlight filtering through leaves.
Buildings: Silhouettes against the horizon can be captivating. You don’t need intricate detail; simple geometric shapes with different window patterns are enough. Consider painting building outlines darker for distance, lighter closer to the track for a sense of depth.
Sky & Atmosphere: A painted sky doesn’t have to be perfect â a few fluffy clouds, varying blue hues, and a soft sunrise/sunset blend create visual impact. This also influences how light reflects on your landscape, enhancing realism.
Roads & Paths: Add subtle textures, use contrasting colors (like brown for dirt paths) or even paint road markings to bring them alive.
The Artist’s Toolbox: Supplies for a Successful Project
- Stretcher Bars/Plywood Panel: Provide the framework for your backdrop. Size depends on your layout!
- Primer: A vital step, it provides a smooth surface for painting and helps colors adhere properly. Use an acrylic primer specifically designed for surfaces like canvas or foam core.
- Acrylic Paints: Water-based and readily available in various shades. Opt for matte finish paints to avoid glare on your backdrop.
- Brushes: Invest in a range of sizes! Fine detail brushes for outlines, wider ones for larger areas.
- Palette Knife/Sponges: These tools help achieve different textures, simulating rough terrain or foliage.
- Masking Tape: Precise outlining and sectioning during painting is essential for clean edges.
Optional Supplies:
* Water Effects: Add shimmering water bodies to your scene. There are realistic pre-made solutions.
Step-by-Step Guide to HO Scale Backdrop Painting
-
Planning & Sketching: Imagine the view behind your layout. Consider scale and perspective â distant objects appear smaller, lighter in color. Draw a rough sketch outlining hills, buildings, skies â even the horizon line is crucial!
-
Prep Your Panel: Attach the stretched fabric to the panel securely, ensuring it’s taut. Apply primer evenly to the entire surface, allowing it to dry thoroughly. This creates a base for smooth paint application.
-
Base Coat: Establish Your Landscape: Start with the background – sky color is essential! Then, use lighter browns and greens to block out general hill/landmasses, paying attention to perspective â objects get lighter and less defined further away.
-
Adding Depth & Texture: Here’s where creativity shines. Use sponges, palette knives, or textured brushes to add layers of different colors, simulating rough terrain, grassy fields, tree patches. Don’t forget subtle variations in light/shadow on your hills â darker shadows on the side facing away from the “light” source.
-
Details Bring It To Life:
- Outline Buildings: Simple rectangles or geometric shapes, varying size for distance.
- Roads: Narrow brown strokes or wider textured ones to simulate dirt paths.
-
Sky & Atmosphere: Add clouds using lighter tones of blue, white â don’t be afraid to experiment with blending techniques for a realistic sky effect.
Pro Tip: Take Breaks! Stepping away and viewing your work from a distance helps spot areas needing adjustment or balancing.
Finishing Touches for A Captivating HO Scale Backdrop
Once the initial painting is complete, consider these finishing touches to bring even more realism:
* Weathering: Subtle dirt streaks on buildings, paths â these details make a big difference in realism. You can use thinned-down acrylic paint or powders for this effect.
-
Dry Brushing: Lightly dry-brush highlights onto areas that would naturally catch the sun, such as hilltops and edges of trees. This adds subtle definition.
-
Finishing Varnish: Once fully dried, applying a clear matte varnish protects your artwork from dust and fingerprints.
Additional Tips & Tricks
-
Reference Photos: Use images of actual landscapes or model railroad backdrops for inspiration and accurate color choices.
-
Layering: Multiple thin coats are better than one thick coat â it creates a smoother finish with more realistic gradients.
- Lighting Matters: Good lighting on your layout is essential to showcasing the details in your backdrop.
- Practice Makes Perfect: Don’t be afraid to experiment! Each backdrop is a learning experience, leading you to better techniques.
-
A Final Word on Backdrop Magic
Remember, the most important element of a model railroad is YOUR enjoyment. Whether it’s intricate cityscapes, sprawling farmlands, or even whimsical fantasy scenes, your backdrop should reflect YOUR passion. So, gather your paints, unleash your creativity, and start crafting a truly immersive world for your HO scale trains!
Now, tell me â what kind of stunning backdrops are you dreaming of bringing to life? Share your ideas in the comments below â let’s inspire each other on this model railroad journey!


