Step-by-Step Guide to Building HO Scale Benchwork
Step-by-Step Guide to Building HO Scale Benchwork
As passionate modelers ourselves, we know the excitement of starting a new project. And what better way to begin than with the solid foundation of a well-built benchwork?
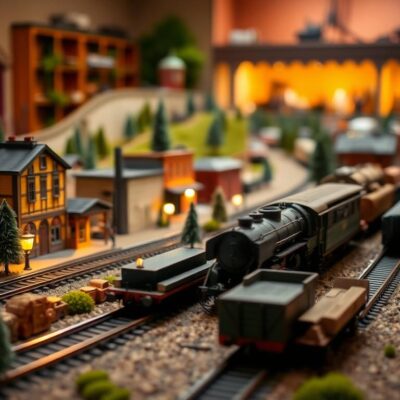
Benchwork isn’t just about the physical structure; it’s the very backbone of your HO scale layout, housing the track, scenery elements, and giving your model railroad its form and function. This detailed guide will walk you through every step of creating durable and customizable benchwork for your dream HO scale layout.
Understanding Benchwork: The Heart of Your Model Railroad
Before we dive in, let’s clarify what benchwork is and why it’s essential:
- Definition: Benchwork is the sturdy frame that supports your model train track and all its accessories. It essentially becomes the foundation upon which your layout is built.
- Key Purposes:
- Structure: Provides a rigid platform for the weight of tracks, rolling stock (trains), and scenery materials.
- Elevation Changes: Creates hills, mountains, and valleys for added realism and visual interest.
- Track Layout Flexibility: Allows you to plan complex track configurations â from intricate switching yards to sprawling mainlines â based on your space and creativity.
- HO Scale Specificity: In HO scale (1:87), benchwork designs consider the scale of components like rolling stock and track gauge, ensuring accurate proportions and realistic aesthetics.
Planning Your Benchwork Masterpiece:
Step 1: Space & Layout Vision:
Begin by determining the dimensions of your space dedicated to the layout. This will heavily influence your overall design. Sketch a preliminary track plan based on:
* Desired Operational Characteristics (passenger, freight, switching yard?)
* Scale Length of Tracks & Trains
* Space Availability: Remember to factor in walkways and scenic areas around your track.
Step 2: The Power of Scenery: Consider how scenery will interact with your layout’s framework. Do you envision steep mountains? Rolling hills? Water features? These elements will determine additional support requirements for your benchwork.
Step 3: Materials & Tools: Gearing Up!
* Common Materials:
* 2×4 lumber (wood is traditional, but other options exist)
* Plywood: To cover the framework and provide a smooth surface for track laying
* Melamine or Foamboard (for elevated structures)
* **Tools of the Trade:**
   * Measuring tape & Square
   * Circular saw or Table saw
   * Drill with various bits
   * Screwdriver
   * Sandpaper (various grits)
   * Level & Carpenter's Pencil
Building Your HO Scale Benchwork:
Step 4: Foundation First:
Your benchwork should sit on a sturdy and level surface. Use:
* Solid Floor: If possible, anchor the framework directly to your floor joists for maximum stability.
* Plywood Base (Portable Layout): Create a solid plywood base platform to elevate your layout from the floor, offering easy mobility if needed.
Step 5: Building the Frame: Laying Out the Grid.
- Primary Supports: Use 2×4 lumber cut to predetermined lengths, spaced according to your layout design. These form the horizontal and vertical supports of your benchwork’s frame.
- Cross Bracing: For added rigidity, cross-brace each pair of parallel supports with diagonal 2x4s, securing them tightly with screws or wood glue. This prevents racking (twisting) over time.
- Legs & Elevations: To create hills or slopes, strategically place shorter legs on one side of the benchwork and extend the framing outwards at angles.
Step 6: Panel Attachment – Level Playtime
- Use a sheet of plywood or melamine to cover the assembled framework. Attach these panels securely to the 2×4 supports using screws, making sure the surface is perfectly flat with the frame.
Step 7: Sanding & Refinement:
- Smooth edges and surfaces to prepare for track laying.
- Apply a sealant (primer) if you’re planning on painting your benchwork.
Bringing it All Together – Beyond the Basics!
Tip #1: Pre-Building Assembly – Maximize Your Workflow:
Consider assembling entire sections of benchwork separately before attaching them to create smaller units for easier transportation and manipulation. Once those individual sections are constructed and fitted together, permanently join them to form your complete layout framework.
Tip #2: Elevation Magic â Curves and Creativity:
To add visual appeal and realism to your benchwork, explore these techniques:
- Curved Support Structure – Use angled cuts in the framing lumber to create smooth curves in your elevated sections.
Tip #3: Scenic Foundation: Consider Built-in Details!
When designing your benchwork, integrate elements that enhance the scenery:
- Storage Compartments â Utilize under-layout space to house ballast, tools, or other essentials.
- Ballast Storage Access â Create a removable panel in the bottom of the benchwork for easy access to adjust and repair track work beneath your layout surface.
Conclusion â Embrace Your Inner Engineer!
Congratulations! By mastering these benchwork building steps, youâve taken a huge step towards crafting a remarkable HO scale layout.
Remember: Model railroading is a journey of continuous learning and creation. Donât be afraid to experiment, make adjustments, and personalize your design along the way. Most importantly, have fun!
Further Reading & Exploration:
- HO Scale Benchwork Design Guides: Online resources often offer templates and blueprints for specific layout styles or track plans.
- Join Local Model Railroad Clubs: Networking with fellow hobbyists is a fantastic way to gain insights, share ideas, and even get assistance with your benchwork project.