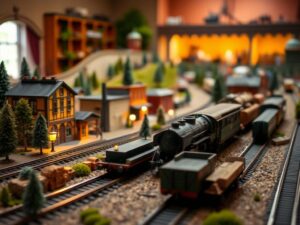
Guide to Replacing Broken Parts on HO Scale Locomotives
Guide to Replacing Broken Parts on HO Scale Locomotives
Guide to Replacing Broken Parts on HO Scale Locomotives: Bring Your Iron Horse Back to Life!
Howdy folks, and welcome back to the blog! As seasoned railroaders know, sometimes even the most meticulously cared-for locomotives can encounter issues. But fear not, fellow enthusiasts, a little knowledge and a few essential tools can go a long way in fixing those pesky broken parts and getting your engine back on track!
Today, we’re diving into the wonderful world of HO scale locomotive repairs â specifically focusing on how to replace common broken parts. Whether you’ve got a loose coupler, a chipped headlight lens, or a stubborn motor giving you grief, this comprehensive guide has you covered. Letâs gear up and get started!
Commonly Broken Parts and Why They Matter:
Before we jump into the nitty-gritty of replacing parts, let’s take a moment to identify some common culprits:
- Couplers: These tiny connectors are responsible for joining your train cars. Broken or misaligned couplers can cause derailments and frustrating disruptions to your meticulously planned runs.
- Lights & Lenses: Locomotive headlights and tail lights aren’t just visually appealing; they also enhance realism and play a crucial role in ensuring safety on your layout. A cracked lens or burnt-out bulb can detract from the overall visual appeal and potentially create hazards.
- Motor Assembly: The heart of your locomotive! A malfunctioning motor can mean your engine stalls, runs sluggishly, or makes unpleasant noises. Understanding how to address basic motor issues can save you headaches (and maybe even a costly replacement).
- Wheels & Axles: A well-functioning set of wheels ensures smooth and reliable operation. Damaged wheels, warped axles, or worn bearings can lead to skipping tracks, derailments, and an overall lackluster performance.
Tools of the Trade:
Now that we’ve familiarized ourselves with potential problems, letâs gather our tools!
- Small Screwdrivers (Phillips & Flathead): A must-have for disassembling most locomotives and accessing smaller components.
- Needle Nose Pliers: Essential for gripping small parts, manipulating delicate wiring, and performing intricate tasks.
- Soldering Iron (with Lead-Free Solder): If youâre dealing with electrical connections, a soldering iron is crucial for making strong and reliable joints. Remember to always work in a well-ventilated area!
- Magnifying Glass: For inspecting those tiny parts and connections â your eyes will thank you!
Steps for Replacing Parts (General Guidance):
-
Preparation: Before tackling any repairs, disconnect the locomotive from your power source and set it down on a stable, clean work surface. If possible, use an anti-static mat to prevent static electricity from damaging sensitive components.
-
Diagnosis & Removal: Carefully inspect your locomotive for damage. Identify the specific broken part you need to replace. Once you’ve identified the culprit, gently disassemble any parts necessary to access it (always refer to your locomotiveâs instruction manual if available).
-
Part Selection: Determine the correct replacement part using your locomotiveâs model number and manufacturer information. There are plenty of online retailers specializing in model train parts â a little research goes a long way!
-
Installation & Reassembly: Install the new part carefully, following any specific instructions that came with it. Pay close attention to details like proper alignment and connection types. Remember, working systematically is key to a successful repair.
- Testing: Reconnect your locomotive to your power source (in sections if you are working on an electrical component) and test its functionality thoroughly.
Tips for Success & Troubleshooting:
-
Consult Manuals & Online Resources: The internet is your friend! Many manufacturers offer downloadable instruction manuals and videos specifically geared towards repair procedures. Donât be afraid to tap into this wealth of knowledge.
-
Clean as You Go: A little dust or debris can wreak havoc on intricate electrical components. Take the time to clean each part with a soft brush, compressed air, or even an old toothbrush before reassembling your locomotive.
-
Start Small: If youâre new to repairs, tackle simpler issues like coupler replacements or light bulb swaps before diving into more complex motor overhauls.
- Document Your Progress: As you repair your locomotives, take pictures or jot down notes about each step. This documentation will prove invaluable if you need to troubleshoot later or tackle similar repairs in the future.
Concluding Thoughts:
Replacing broken parts on HO scale locomotives isnât just about fixing a technical issue; itâs also an opportunity to deepen your understanding of how these intricate machines work and gain a sense of satisfaction from bringing them back to life!
Remember, every model railroader begins as a novice. Don’t be afraid to experiment, seek advice from experienced hobbyists (thereâs a whole community eager to help!), and enjoy the journey of mastering your repair skills.


